.jpg)


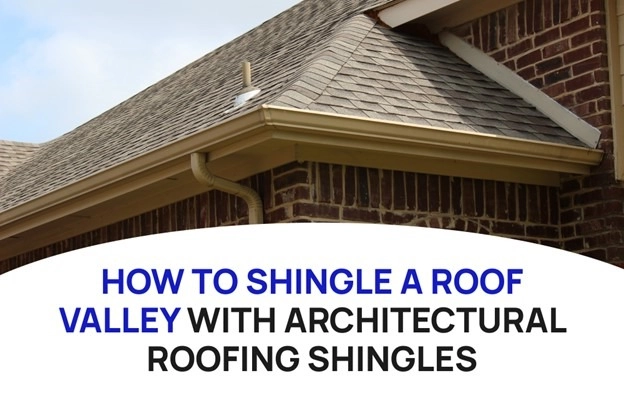
A roof valley is where two roof planes meet in a V, and it's the single spot on a Colorado roof most prone to leaking because it carries the most water and the most snowmelt off the entire roof. Get the flashing and shingle layering right here and the rest of the roof follows.
What is a roof valley and why does it matter more in Colorado's climate?
A valley channels rain and snowmelt from two roof slopes down toward the gutters. On a Front Range home, that means concentrated water and, in winter, concentrated ice moving through one narrow channel. A gap or weak seam in a valley shows up as a leak faster than almost anywhere else on the roof, because water volume there is higher than on a flat plane.
Should a Colorado roof use an open or closed valley?
Both work here when installed correctly. An open valley exposes a metal flashing channel down the center, which handles heavy water and snowmelt volume well and is easy to inspect. A closed valley covers the flashing with shingles, woven or cut, for a more uniform look. Roofers across the Denver metro commonly recommend open metal valleys on north-facing slopes that hold snow longest, and closed valleys elsewhere for appearance.
What flashing does a valley need to handle Front Range snow load?
Start with roofing underlayment that runs fully into the valley, then install valley flashing the entire length, overlapped and nailed at the outer edges only, never near the centerline. This metal strip is the primary water barrier; the shingles above it are the backup. On homes above 6,500 feet or in areas with heavy snow accumulation, a wider flashing channel and a self-adhering ice and water membrane under it are worth the extra material cost.
How do architectural shingles perform in a valley compared to 3-tab shingles?
Architectural, or dimensional, shingles are thicker and hold up better to the repeated flexing and impact a valley sees from hail and snow shedding than older 3-tab shingles. Their heavier mat also resists the granule loss that Colorado's high-UV sun accelerates on flatter roof sections.
What's the step-by-step process for shingling a valley?
- Underlayment and flashing: Run underlayment into the valley, then install metal valley flashing the full length, overlapped and secured at the edges.
- Lay shingles up to the valley: Work shingles from each side toward the valley, letting them overhang slightly to guide water down rather than let it pool.
- Trim and weave or cut: For a woven valley, alternate shingles from both sides, layering for a tight seal. For a closed-cut valley, trim one side's shingles at the centerline and overlap the other side's shingles across the cut edge.
- Secure the shingles: Nail evenly, staying well clear of the valley centerline so no fastener penetrates the water channel.
- Inspect and seal: Check every seam where flashing meets shingle, and seal any gap with roofing cement before the next storm.
Why do valleys fail first after a Colorado hailstorm?
Hail striking a valley at an angle can crease or crack the shingle edges right where they overlap the flashing, opening a path for water that isn't visible from the ground. After any hailstorm with stones half an inch or larger, a valley-focused inspection should be part of your damage check, along with the rest of the roof.
How much ice and water shield does a Colorado valley need?
Most Front Range roofers run a self-adhering ice and water membrane the full length of every valley, extending at least 3 feet up each side from the centerline, regardless of elevation, because ice damming and rapid snowmelt happen even at lower Denver-metro elevations, not just in the mountains.
What's the closed-cut method and when is it the better choice here?
The closed-cut method trims shingles from one roof side at the valley centerline and layers the other side's shingles over the cut edge for a clean, single-color look. It's a strong choice for visible street-facing valleys where appearance matters and snow load is moderate.
What's the woven-shingle method and does it work with architectural shingles?
Weaving alternates shingle courses from both roof planes across the valley, building extra material thickness right where water volume is highest. It works with architectural shingles and is the common choice on north-facing valleys that hold snow and ice longest through a Front Range winter.
How do you seal a valley without trapping water underneath?
Apply roofing cement only at seams and edges, never as a blanket coating across the whole valley. Sealant applied over an entire valley can trap moisture underneath the shingles instead of letting it drain, which speeds up rot in the decking below.
How much does professional valley reshingling cost on a Front Range home?
| Job scope | Typical Denver-metro cost |
|---|---|
| Single valley repair (flashing + reshingle) | $400 - $900 |
| Full roof re-shingle including all valleys, 2,000 sq ft | $9,000 - $16,000 |
| Ice and water shield upgrade, per valley | $100 - $250 |
Does a permit apply if you're only reworking a valley, not the whole roof?
Most Front Range cities and counties don't require a permit for a small valley repair confined to reflashing and reshingling a limited area. A repair involving decking replacement or more than a minor section does. Check with your local building department before work starts.
Can a bad valley repair affect a home inspection or sale?
Yes. A patched or mismatched valley is one of the first things a Colorado home inspector photographs, and it commonly triggers a repair request during the inspection objection period. Clean, properly flashed valley work protects your negotiating position and supports your asking price.
How frequently should a Colorado roof valley be inspected?
Check valleys after every significant hailstorm, at least once in spring after the winter freeze-thaw cycle, and again in fall before the first snow. Look for granule loss, cracked or lifted shingle edges, and any gap where flashing meets shingle.
What tools does a valley repair actually require?
Roofing nails, a hammer or nail gun, a utility knife, roofing cement, valley flashing, underlayment, and shingles matched to the existing roof profile. If matching an older roof's exact shingle color or profile proves difficult, a licensed local roofing company can advise on the closest available match.
Does HOA architectural review apply to a valley-only repair?
A like-for-like valley repair rarely triggers HOA review, but any change in shingle color or material does across Front Range associations. Confirm before ordering materials if your roof falls under HOA rules; see the Denver HOA rules and fees guide.
If the project also involves exterior door installation, bundling both jobs with one licensed contractor can simplify scheduling and warranty coverage.
Where to go next
- Search every home for sale in Colorado
- Preparing and adding value before selling
- Colorado hail and roof cost comparison
- How to remove and prevent Colorado ice dams
- Denver HOA rules and fees guide
Talk to the Kenna Real Estate Group
The Kenna Real Estate Group helps Colorado sellers understand how roof and valley condition affect a buyer's inspection response, and helps buyers evaluate roof repairs before closing. Call or text 303-955-4220. A live person answers. Not a robot, not a phone tree. Or search every home for sale in Colorado today.
Homes for sale that match this post
Guides
Questions about any home in Colorado? Call or text 303-955-4220. A live person answers.