.jpg)


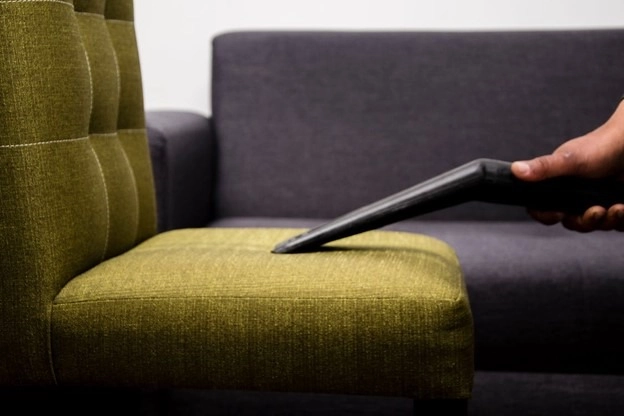
A carpet extractor sprays a cleaning solution into fabric and immediately pulls it back out with suction, and it works on upholstery the same way it works on carpet: pretreat, extract, and let it dry. In Colorado, the one variable that changes the process is drying time, since the same dry, low-humidity air that stresses carpet fiber also pulls moisture out of upholstery fast, which is an advantage here that most climates do not get.
How do I use a carpet extractor on upholstery the right way?
- Vacuum first. Remove loose dust, pet hair, and Front Range grit before adding any liquid, so the extractor is not just pushing dirt deeper into the fabric.
- Check the fabric tag. A "W" or "WS" code means water-based cleaning works for that fabric; an "S" code means solvent-only, and water can shrink or stain it.
- Pretreat stains. Spot-treat set-in marks 10 to 15 minutes before running the extractor over the whole piece.
- Use the upholstery attachment, not the floor head. It uses less water pressure and a smaller nozzle built for cushions and fabric seams.
- Work in slow, overlapping passes, pulling the trigger to spray and release to extract in the same motion, rather than soaking the whole piece first.
- Extract dry passes at the end with no solution, just suction, to pull out as much moisture as possible before it sits.
Does upholstery dry faster or slower at Colorado's altitude?
Faster, in most cases. Denver's low humidity, 10% to 25% in winter, pulls moisture out of fabric quickly once the bulk of it has been extracted, and a fan or open window speeds it further. The risk runs the other way from a humid climate: over-wetting furniture in a Colorado living room can still leave a damp cushion core for a day or two even though the surface feels dry, so mold is possible if you oversaturate rather than extract properly.
How much does renting a carpet extractor cost in the Denver metro?
| Option | Cost | Best for |
|---|---|---|
| Rental, 4-hour block | $35 to $60 | One room or a single large piece |
| Rental, full day | $50 to $90 | Whole home before a move or listing |
| Portable upholstery extractor, purchase | $150 to $400 | Households with pets or frequent spills |
| Professional upholstery cleaning | $50 to $150 per piece | Delicate or antique fabric |
For households cleaning upholstery more than a couple of times a year, a portable carpet extractor pays for itself against rental fees within a year or two.
Can a carpet extractor remove mud season stains from furniture?
Yes, for most fresh mud, mag chloride residue, and dirt tracked onto upholstery near an entryway. Blot off loose dried mud first, then treat the same way as any other water-based stain; ground-in de-icer residue takes two extraction passes to fully lift.
Can wildfire smoke odor be removed from furniture with an extractor?
Extraction helps, but a baking soda application left on the fabric for a few hours before vacuuming and extracting pulls out more of the smoke particulate than water alone. Smoke odor sits deep in cushion foam, so a piece exposed during a bad Front Range smoke week needs two rounds of treatment before the smell is fully gone.
What is the upholstery cleaning schedule for a Colorado home?
- Every 6 to 12 months for normal household use.
- Every 3 to 4 months with pets or young children in the home.
- Immediately after wildfire smoke season if windows were open during a smoke event.
- Before listing a home for sale, since clean upholstery photographs and shows noticeably better than dusty or stained fabric.
What upholstery fabric holds up best to Front Range dust and pollen?
Tightly woven synthetics and leather resist dust buildup better than loose-weave natural fabrics, which trap Front Range dust and pollen deep in the fibers. If you are furnishing a Denver rental before a new tenant moves in, our guide to furnished Denver rentals covers which fabrics hold up best under tenant turnover, and a tighter weave also extracts cleaner with fewer passes.
Should I rent or buy a carpet extractor for a Colorado home?
Rent for a one-time deep clean before a move or a listing photo shoot; buy if you have pets, kids, or plan to clean more than two or three times a year, since a portable unit costs less than four rentals. Either way, the technique matters more than the machine: slow passes, a dry final pass, and good airflow to finish the dry in Colorado's low humidity.
What is the difference between a carpet extractor and a steam cleaner?
A carpet extractor sprays a water-and-cleaning-solution mix and immediately vacuums it back out, so the fabric ends up damp, not soaked, and dries within a few hours in Colorado's dry air. A true steam cleaner uses heated vapor with little to no liquid extraction, which cleans on the surface but does not pull deep-set dirt and stains out of upholstery cushions the way an extractor's suction does.
Can pet stains and odor be removed from upholstery with an extractor?
Yes, an enzyme-based pretreatment breaks down the proteins in pet urine and stains before the extractor pass, which plain water and soap alone will not fully remove. Let the enzyme cleaner sit for the time listed on the product, commonly 10 to 15 minutes, before running the extractor over the area, and repeat the pretreatment step for an older, set-in stain.
How does extractor cleaning help before listing a Colorado home?
Buyers touring a Front Range listing notice dusty, stained, or dull-looking upholstery in the first few seconds of walking into a room, and it is one of the cheapest fixes on a pre-listing checklist. A full-home extractor pass on sofas, chairs, and area rugs the week before photos go up costs a fraction of a paint or flooring project and measurably improves how a living room photographs.
What is the best way to dry upholstery quickly in a Colorado winter?
Run a box fan or the HVAC fan on continuous for a few hours after extraction, and crack a window if the outdoor temperature allows, since moving air dries fabric far faster than still air even in low humidity. Avoid using furniture again until it is fully dry through the cushion, not just dry to the touch on the surface; with good airflow, that takes 4 to 8 hours in a Front Range winter. A cushion left damp underneath a dry-feeling top layer is the most common cause of a musty smell showing up a few days after cleaning. If a piece still feels cool or heavy after a full day of drying, pull the cushion cover off if it zips and let the foam insert air out separately.
Where to go next
- Preparing and Adding Value Before Selling
- Rental Property Checklist for Colorado Owners
- Indoor Air Quality and Home Comfort: What Colorado Homeowners Should Know
- Moving to Denver
- Search homes for sale in Lakewood
- Search every home for sale in Colorado
Talk to the Kenna Real Estate Group
Whether you are freshening up furniture before listing a Front Range home or getting a new place move-in ready, the Kenna Real Estate Group can point you toward what actually shows well in photos. Call or text 303-955-4220. A live person answers. Not a robot, not a phone tree. Or search every home for sale in Colorado to start your search.
Homes for sale that match this post
Guides
Questions about any home in Colorado? Call or text 303-955-4220. A live person answers.