New - 6 Hours Ago

$499,900
Active
3
Beds
3
Baths
2423
Sqft
0.1263
Acres
5148 Somervell Ct, Colorado Springs, CO 80925
MLS#: 1459795
.jpg)


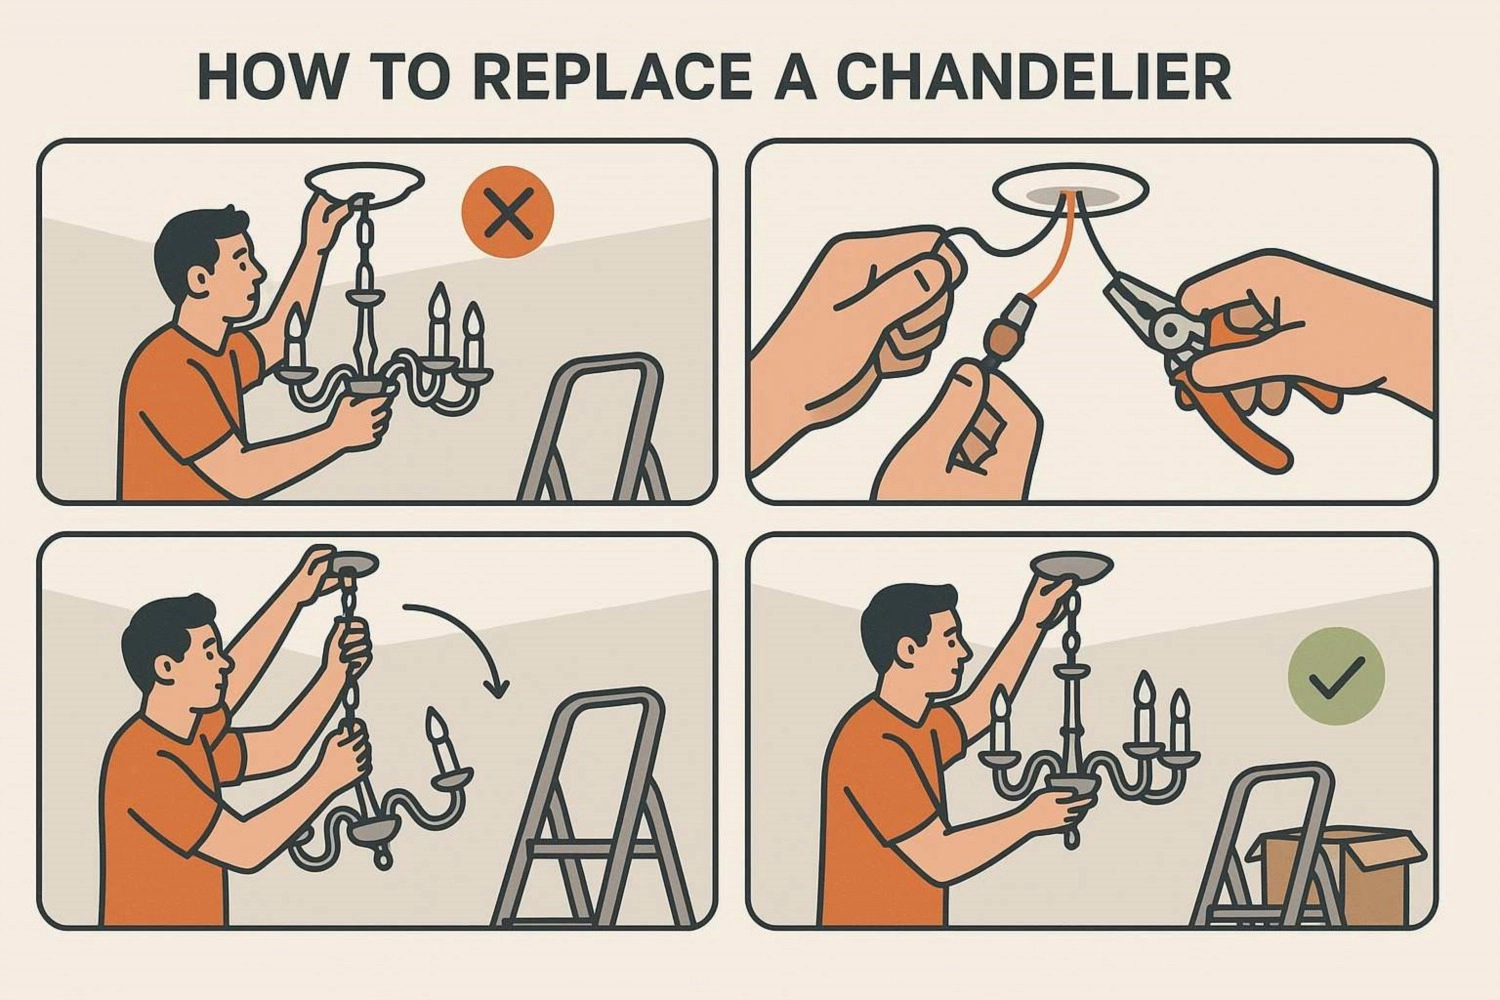
Replacing a chandelier in a Colorado home is a project most homeowners finish in an afternoon, provided three checks come first: the power is off at the breaker, the ceiling box is rated to hold the new fixture's weight, and the wiring underneath is sound enough to reuse. Skip any of those three and the project turns into a callback for a licensed electrician.
Switch off the breaker that feeds the fixture, then confirm the circuit is dead with a non-contact voltage tester at the fixture itself. A wall switch alone does not prove the circuit is de-energized; test it directly at the wires. Gloves and eye protection are worth wearing for the ten minutes it takes to remove decorative glass or crystal pieces before the fixture comes down, since those pieces chip and crack easily once loose.
Front Range building departments, including Denver, Aurora and Colorado Springs, let a homeowner swap a fixture on existing wiring without a permit, because no new circuit is being added. The line moves once the ceiling box lacks a ground wire, the existing wiring shows cracked or brittle insulation, or the new chandelier needs a dimmer or a new switch leg run to it; at that point a licensed electrician and a permit are the correct call. Confirm the exact rule with your city's building department before starting, since the threshold differs by jurisdiction. A licensed electrician on the Front Range charges roughly $100 to $250 for a straightforward fixture swap that includes a ceiling box upgrade, less than the cost of a warped or cracked ceiling from a fixture that pulled loose.
Older bungalows in neighborhoods like Denver's Baker, Berkeley and Sunnyside sometimes still carry knob-and-tube or ungrounded two-wire circuits from before mid-century rewiring. If the ceiling box has no ground wire, or the insulation on the existing wires looks brittle, stop and call a licensed electrician rather than connecting a new fixture to compromised wiring.
Every ceiling electrical box carries a weight rating stamped on the metal, 35 to 50 pounds for a standard fixture box in most homes built since the 1990s. A heavier chandelier needs a box rated for the load, secured directly to a joist or braced between joists with a fan-rated brace bar. Push on the box before committing to a fixture; if it flexes, replace it first. A chandelier hanging from an under-rated box is a repair waiting to happen, not a finished project, and it is one of the first things a home inspector flags during a pre-listing walkthrough.
Most new chandeliers ship rated for LED bulbs, which draw a fraction of the power an old incandescent fixture used and generate far less heat, a real advantage during a Front Range summer when every extra degree in a room works the air conditioner harder. Pairing the new fixture with a dimmer switch cuts energy use further and extends bulb life; confirm the fixture and bulbs are both labeled dimmer-compatible before wiring one in, since not every LED bulb dims cleanly.
Unbox the new fixture and lay out every part against the included hardware list before starting; missing a link of chain or a wire nut mid-installation is the most common reason these projects stall. Follow the manufacturer's assembly order, tighten screws snugly without over-tightening, and match wire colors exactly: black to black (hot), white to white (neutral), and the bare copper or green wire to the ground screw on the box. Homeowners shopping for a new fixture can browse the full chandelier collection at Modern Chandelier, and the company's Modern Chandelier site has sizing guides for matching a fixture to room dimensions.
Over a dining table, the bottom of the fixture sits 30 to 36 inches above the tabletop, with more room in Colorado's newer two-story great rooms and high-ceilinged luxury builds common in Highlands Ranch and Castle Rock. For an entry or foyer, leave at least 7 feet of clearance from the floor to the bottom of the fixture. A chandelier hung with extra chain links in a two-story entry should still land within that range; add or remove links before final mounting rather than after.
A flickering chandelier almost always traces back to a loose wire nut or a bulb that isn't seated correctly; recheck both before assuming the fixture itself is defective. A chandelier that hangs unevenly has one chain link out of adjustment or an arm that wasn't tightened to the same torque as the others. If the fixture won't turn on at all, check the breaker, test the wall switch against another fixture on the same circuit, and swap the bulb before calling an electrician.
A dated builder-grade fixture is one of the fastest, least expensive updates on a pre-listing punch list, and it shows up in listing photos more than almost any other single fixture in the house. The Kenna Real Estate Group's guide to adding value before selling covers which lighting and finish updates buyers notice first, and it pairs well with the full Colorado home-selling guide for anyone planning a broader pre-listing punch list.
Most Front Range HOAs regulate what's visible from the street, not an interior light fixture, so an HOA review rarely applies to a chandelier swap; the one exception is an entry light mounted on the home's exterior, which some architectural guidelines do cover. Check the community's covenants before ordering anything wall-mounted outside.
To find a licensed electrician in the Denver metro, confirm the license number through the Colorado Department of Regulatory Agencies before hiring, and ask for a fixed quote on the fixture swap rather than an open-ended hourly estimate. An old fixture in working condition can go to a local Habitat for Humanity ReStore or a metal recycler instead of the landfill; both options exist in every county across the Front Range.
The Kenna Real Estate Group helps Front Range sellers decide which lighting and finish updates are worth doing before photos and showings. Call or text 303-955-4220. A live person answers. Not a robot, not a phone tree. You can also search every home for sale in Colorado while you plan your next move.
Questions about any home in Colorado? Call or text 303-955-4220. A live person answers.
Swapping a fixture on existing wiring does not require a permit in Denver, Aurora or Colorado Springs, but adding a new circuit, switch leg or dimmer does. Confirm with your city's building department first.
A homeowner can handle a straightforward fixture swap. Call a licensed electrician if the ceiling box lacks a ground wire, the existing wiring looks brittle, or the ceiling box isn't rated for the new fixture's weight.
Check the weight rating stamped on the box, 35 to 50 pounds in most homes built since the 1990s. A heavier fixture needs a box secured to a joist or braced with a fan-rated bar; if the box flexes when pushed, replace it before hanging anything.
Bungalows in older Denver neighborhoods sometimes still carry knob-and-tube or ungrounded circuits. If the ceiling box has no ground wire or the insulation looks brittle, stop and call a licensed electrician.
The bottom of the fixture sits 30 to 36 inches above the tabletop. In a two-story entry, leave at least 7 feet of clearance from the floor.
A loose wire nut or a bulb that isn't fully seated causes most flickering. Recheck both connections before assuming the fixture is defective.
Yes. A dated builder-grade fixture is one of the fastest, least expensive pre-listing updates, and it shows clearly in listing photos of the dining room or entry.
Mounting the new fixture on an under-rated or unsecured ceiling box, or skipping the ground wire connection, are the two mistakes that cause the most callbacks.


