.jpg)


New - 1 Hour Ago
Older Front Range homes, especially anything built before 1978, hide two specific hazards that change how a renovation should start: lead paint and asbestos. Testing for both before demolition, and knowing which trades Colorado requires a license for, protects your household, your budget, and your resale value.
This guide covers what to test for, what the law requires, and how expansive soil and altitude add their own structural and mechanical considerations to a Front Range renovation that a general how-to guide skips.
What hazards hide in an older Front Range home during renovation?
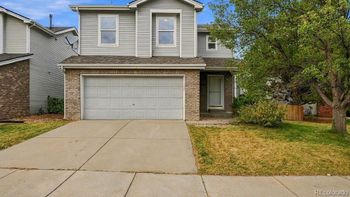
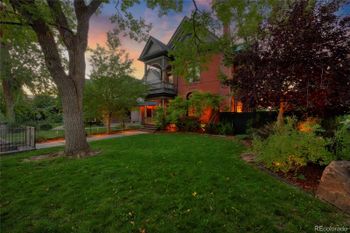
Homes built before 1978 across Denver, Aurora, Lakewood, and Colorado Springs can carry lead-based paint, and homes built before the early 1980s can carry asbestos in textured ceilings, vinyl flooring, and pipe insulation. Structural surprises, especially foundation movement tied to expansive clay soil, show up in homes of any age once walls open up. Test before you cut into anything.
Does my pre-1978 Denver home have lead paint?
Treat any home built before 1978 as if it has lead-based paint until testing proves otherwise; federal law banned lead paint for residential use that year, but older layers remain underneath newer coats in a large share of Front Range homes. Disturbing it through sanding, scraping, or heat guns releases lead dust, which is the real hazard, not the intact paint itself.
How do I test for lead paint before renovating in Colorado?
Use an EPA-recognized test kit for a quick check, or hire a certified lead inspector for a full report before a renovation that disturbs painted surfaces on a pre-1978 home. A lab-verified test costs a few hundred dollars and tells you definitively whether the EPA's renovation rule, described next, applies to your project.
What is the EPA's Renovation, Repair, and Painting rule?
The federal Renovation, Repair, and Painting (RRP) rule requires any contractor disturbing more than six square feet of painted surface in a pre-1978 home to be lead-paint-certified and to follow specific containment and cleanup procedures. Ask any contractor bidding on your project for their EPA lead-certification number before signing, and confirm it directly with the EPA if the project involves demolition or sanding on original paint. If test results come back positive, a lead-paint-certified painting crew brings dust-controlled prep, containment, and HEPA cleanup that a DIY approach cannot match.
Does an older Front Range home have asbestos?
It can, particularly in homes built before the early 1980s, in textured "popcorn" ceilings, vinyl floor tile and its adhesive, pipe and duct insulation, and some siding materials. Intact, undisturbed asbestos is a low risk left alone; the danger comes from cutting, sanding, or demolishing it without testing first, which releases fibers into the air.
Who can remove asbestos legally in Colorado?
Colorado requires a certified asbestos abatement contractor for removal of regulated asbestos-containing material, and the Colorado Department of Public Health and Environment sets the certification and notification requirements. Never sand, drill, or demolish a suspected asbestos material yourself. Stop work, get a sample tested by an accredited lab, and bring in a certified contractor if the test comes back positive.
What renovation work requires a licensed electrician in Colorado?
Any work beyond a like-for-like fixture swap, including new circuits, panel upgrades, and anything touching your main electrical service, requires a licensed electrician pulling a permit. Denver and most Front Range cities require electricians to hold a local license, and unlicensed electrical work can void your homeowner's insurance if it causes a later loss.
What plumbing and gas work requires a licensed contractor here?
Gas line work, water heater and furnace installation, and any new plumbing rough-in require a licensed plumber or gas fitter pulling a mechanical or plumbing permit. This matters even more in Colorado than in many states because of altitude: a gas appliance installed at Denver's 5,280-foot elevation needs a high-altitude-rated model or a factory derate, a step an out-of-area or unlicensed installer sometimes misses entirely.
What structural changes require a Denver building permit?
Removing or altering a load-bearing wall, changing a roofline, adding a window or door opening, and any foundation work all require a permit and, in most cases, an engineer's stamped plan. Structural changes are the category of renovation work most exposed to discovery as unpermitted during a later home sale, because a buyer's inspector checks framing and roofline against the county's permit history.
How does expansive clay soil create structural hazards during renovation?
Front Range soils include expansive bentonite clay that swells and shrinks with moisture, and it can move a foundation, slab, or footing that was not engineered to account for it, especially once a renovation adds new load or disturbs drainage around the foundation. Any renovation adding weight to an existing foundation, or touching grading and drainage near the house, should start with a geotechnical evaluation, not a demolition crew. For homes with settlement severe enough that floors slope or piers have already failed, specialists who handle house foundation lifting manage the engineering, permitting, and temporary support that leveling a structure requires.
What should I know about flammable material storage in a garage workshop?
Store paint thinners, fuel, and adhesives in a dedicated, ventilated metal cabinet away from ignition sources like water heaters and furnaces, never inside living space. A compliant cabinet for flammable materials contains spills and vapor and is a low-cost, high-value protection for any Front Range garage workshop used during a renovation.
Does silica dust from cutting concrete or stone require special controls?
Yes. Cutting, grinding, or drilling concrete, brick, tile, or stone releases fine respirable silica dust, a serious long-term respiratory hazard. Use wet-cutting methods and HEPA-filtered vacuum extraction rather than dry cutting, and wear a properly rated respirator during any renovation task that produces visible dust.
What protects my resale value if hazards are found and handled correctly?
Documentation. Keep every lab test result, abatement certificate, permit, and inspection sign-off in one file, because a buyer's lender, inspector, and title company all want to see that lead, asbestos, or structural work was handled by certified and licensed professionals, not just fixed. A well-documented renovation, even one that found and addressed a hazard, reassures a buyer far more than a home with no records at all.
Do I have to disclose lead paint or asbestos work when I sell?
Federal law requires disclosure of known lead-based paint hazards on any home built before 1978, using a specific disclosure form at the time of sale. Colorado's seller property disclosure form also asks about known hazards and unpermitted work as a whole, so disclosing what you found and how you addressed it is both a legal requirement and, in most cases, the better negotiating position.
What does a pre-renovation checklist look like for a Front Range home?
- Test for lead paint and asbestos before any demolition on a home built before the early 1980s.
- Confirm which trades on your project require a licensed contractor in your specific city.
- Order a geotechnical evaluation before any work adding load to the foundation or disturbing drainage.
- Verify mechanical equipment bids already include altitude-rated models.
- Pull permits for every structural, electrical, plumbing, and mechanical change before work starts, not after.
When should I bring in a specialist instead of doing it myself?
Any time a test comes back positive for lead or asbestos, any time you have not confirmed whether a wall you want to remove is load-bearing, and any time gas, main electrical service, or foundation work is involved. These are the categories where a licensed, certified professional protects both your household and your project's legal standing, and where the cost of hiring it out is small compared to the cost of getting it wrong. The post on 7 hidden home problems that can ruin a renovation covers more of these early-warning signs.
Where to go next
- Common problems with remodeling older homes
- Essential considerations for renovating an older home
- Does a general contractor need a license? State-by-state
- Preparing and adding value before selling
- Search every home for sale in Colorado
- Meet the Kenna Real Estate Group agents
Talk to the Kenna Real Estate Group
The Kenna Real Estate Group helps Front Range owners of older homes plan a renovation that protects resale value, and can point you to certified testing labs and licensed contractors our clients have used. Call or text 303-955-4220. A live person answers. Not a robot, not a phone tree. If you would rather buy a home that is already updated, search every home for sale in Colorado.
Homes for sale that match this post
Guides
Questions about any home in Colorado? Call or text 303-955-4220. A live person answers.